Categories
My Blog

How to Remove Scuff Marks from Run-ins with Mailboxes

If you’ve ever had a close encounter with a mailbox while navigating a tricky driveway or narrow street, you’re not alone. Scuff marks from mailboxes are a common problem, and while they may seem like minor blemishes, they can quickly diminish the look and value of your car. Fortunately, with the right tools and techniques, these marks can be effectively removed. Here at Apple Auto Detailing in NYC, we specialize in restoring your vehicle’s pristine appearance, and in this blog, we’ll share our top tips and tricks for tackling these pesky scuffs.

Understanding Scuff Marks and Their Impact

Scuff marks typically occur when the surface of your vehicle’s paint comes into contact with another hard object—in this case, a mailbox. Unlike deep scratches that penetrate the paint layers, scuff marks are usually surface-level abrasions that involve the transfer of paint or material onto your car’s surface. While these marks may not affect the underlying paint, they can stand out, detracting from your car’s overall appearance and making your vehicle look worn.

Step-by-Step Guide to Removing Scuff Marks

With a few simple materials, you can remove these scuff marks at home. However, be mindful that working on your car’s exterior requires care and precision. Here’s a straightforward guide from the detailing experts at Apple Auto Detailing.

1. Clean the Area Thoroughly

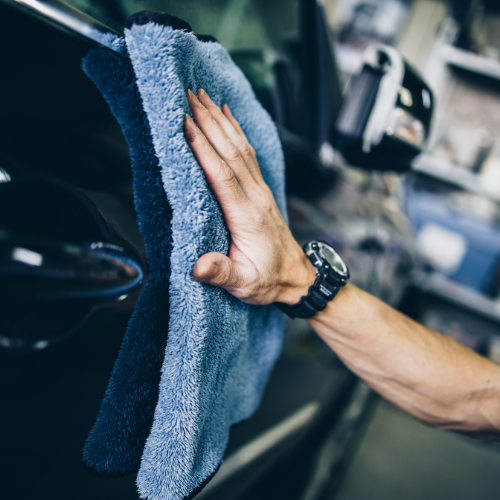
Before starting the removal process, it’s essential to clean the affected area to remove any dirt or debris. Use a gentle car wash soap and water, and a microfiber cloth to avoid scratching the paint. Clean the area in a circular motion to ensure no contaminants are left on the surface.

2. Assess the Damage

After cleaning, examine the scuff mark carefully to determine its depth. If you feel roughness when you run your fingers over the mark, it might include scratches deeper than the top layer of the paint. For deeper marks, a professional auto detailing service like Apple Auto Detailing in NYC may be the best option.

3. Use a Mild Abrasive

For surface-level scuffs, a mild abrasive like baking soda can be effective. Create a paste with baking soda and water, then apply it to a soft, clean cloth. Rub the paste gently over the scuff mark in a circular motion. Baking soda is gentle enough that it shouldn’t harm the paint but strong enough to lift off the scuff.

Another option is a car-specific scratch remover. These products are formulated to smooth out minor scuffs without affecting the paint. Follow the instructions on the scratch remover for best results.

4. Apply Polishing Compound

Once the scuff mark begins to fade, apply a small amount of polishing compound to the area using a microfiber cloth. Gently rub it into the surface in circular motions. This will help smooth the surface and restore the shine. Once you’ve polished the area, wipe off any excess compound with a clean cloth.

5. Apply a Protective Wax Coating

After removing the scuff mark, protect the area with a quality wax. The wax not only provides a protective layer but also helps to blend the newly polished area with the rest of the paint. Apple Auto Detailing offers various wax options that provide a smooth, glossy finish and long-lasting protection for your vehicle.

When to Seek Professional Help

While these tips can handle minor scuffs, deeper scratches or extensive damage may require professional attention. Apple Auto Detailing’s trained technicians can expertly restore your vehicle’s paintwork using industry-grade equipment and compounds, ensuring that even stubborn marks are effectively removed without affecting your car’s original finish.

A Word from Denton Mailbox Repairs

As Denton Mailbox Repairs notes, while mailboxes can sometimes withstand a bump, your car’s paintwork may not. Addressing these scuff marks quickly is crucial to avoid further damage, such as corrosion or paint chipping.

Protecting Your Vehicle from Future Scuff Marks

Prevention is always better than repair, and there are ways to reduce the likelihood of scuff marks in the future:

Be Mindful of Tight Spaces: Take extra care when driving near obstacles like mailboxes, especially in narrow driveways or streets.

Install Parking Sensors: Parking sensors can alert you to nearby objects and help you avoid accidental run-ins.

Regular Maintenance and Detailing: Routine detailing not only keeps your vehicle looking fresh but also applies protective coatings that can make removing future scuffs easier.

Why Choose Apple Auto Detailing in NYC?

At Apple Auto Detailing, we understand that even small blemishes can affect your pride in your vehicle. We specialize in restoring your car’s exterior, removing scuffs, scratches, and other imperfections that accumulate from daily driving. With a focus on quality, we use premium products and expert techniques to ensure a flawless finish.

If you’re dealing with a mailbox scuff or any other type of vehicle blemish, don’t hesitate to reach out. Our team of detailing experts is here to help restore your car’s beauty and ensure you drive away with a flawless finish. Let us make your vehicle shine again!
Categories
My Blog

Detailing an RV

Detailing an RV is an immersive process that goes beyond a simple wash and vacuum. It is an intricate combination of tasks designed to bring out the best in your vehicle, both aesthetically and functionally. This comprehensive approach ensures that every inch of your RV is meticulously cleaned, polished, and protected, ultimately extending its lifespan and enhancing your travel experience.

Understanding the anatomy of an RV is the first step in this detailing journey. An RV is more than just a vehicle; it is a mobile home with a blend of automotive and residential elements. This dual nature necessitates a multifaceted detailing approach, addressing both the exterior’s automotive needs and the interior’s residential requirements.

Starting with the exterior, it is crucial to tackle the bodywork, which bears the brunt of the elements. The exterior of an RV faces harsh weather conditions, road grime, and constant exposure to UV rays, all of which can deteriorate its appearance and functionality. Begin by giving the RV a thorough wash using a high-quality automotive detergent. This step is essential to remove dirt, grime, and any accumulated debris without damaging the paintwork. Special attention should be given to the roof, a common area for dirt buildup due to its flat surface and limited accessibility.

Once the exterior is clean, the next step is polishing. Polishing serves to restore the shine, remove minor scratches, and eliminate oxidation that dulls the paint. This step is not just about aesthetics; it plays a crucial role in protecting the RV’s surface from further damage. Using a high-quality polish and a buffer can make this task more efficient and effective. After polishing, applying a coat of wax provides an additional layer of protection. This wax coating helps repel water, dirt, and UV rays, ensuring that the RV maintains its glossy appearance for a longer period.

The wheels and tires are another critical aspect of exterior detailing. They often accumulate a significant amount of road grime and brake dust, which can lead to corrosion if not properly cleaned. Thoroughly clean the wheels and tires, then apply a tire conditioner to enhance their appearance and prevent cracking and fading. Don’t forget the undercarriage, a part of the RV that often gets overlooked but can harbor a lot of grime and salt, especially if you travel in snowy regions. A clean undercarriage is vital for preventing rust and corrosion, which can compromise the RV’s structural integrity.

Transitioning to the interior, the process begins with decluttering. Over time, RVs can accumulate a surprising amount of items, making the space feel cramped and disorganized. Remove all unnecessary items to create a clean slate for the detailing process. Once decluttered, start cleaning the surfaces, ensuring you use products suitable for the various materials inside the RV, such as wood, plastic, and fabric. For the kitchen area, a degreaser can effectively remove stubborn grease and food stains. In the bathroom, use a strong disinfectant to sanitize all surfaces, paying special attention to areas prone to mold and mildew.

Upholstery cleaning is another vital component of interior detailing. RVs often have fabric seats, curtains, and other soft furnishings that can absorb odors and stains over time. Using a fabric cleaner or steam cleaner can rejuvenate these materials, making the interior look and smell fresh. Pay attention to the upholstery’s care instructions to avoid damage during cleaning.

According to our resident RV expert, Randy, who owns a mobile RV mechanic service, one often overlooked aspect of RV detailing is the air conditioning system. The vents and filters can harbor dust, allergens, and even mold, affecting the air quality inside the RV. Cleaning or replacing the filters and wiping down the vents can significantly improve the indoor air quality, making the environment healthier and more comfortable.

Finally, consider the finishing touches that add a personal touch to your RV. After all the cleaning, polishing, and vacuuming, small additions can make a big difference in the overall ambiance. Fresh linens, scented air fresheners, and decorative elements like throw pillows, rugs, or plants can make the RV feel more like home. These personal touches not only enhance the visual appeal but also contribute to a more pleasant and inviting atmosphere.

Detailing an RV is a labor of love that requires time, effort, and attention to detail. However, the rewards are well worth it. A meticulously detailed RV not only looks stunning but also provides a more enjoyable and comfortable travel experience. Moreover, regular detailing helps maintain the RV’s value and functionality, ensuring that it remains a reliable and cherished companion for all your adventures. So, the next time you set out on a journey, take pride in knowing that your beautifully maintained home on wheels is ready to provide you with comfort and style every mile of the way.

Categories
My Blog

Spring Cleaning Your Car: A Comprehensive Guide to Refreshing Your Vehicle

As the long winter months come to an end and the sun starts to shine brighter, it’s time to give your car the attention it deserves. Spring cleaning your car is not just about vanity; it’s about maintaining a clean and well-functioning vehicle. A thorough cleaning not only enhances the appearance of your car but also contributes to its longevity and value. In this article, we will provide you with a comprehensive guide to spring cleaning your car, covering both the interior and exterior, as well as essential maintenance tasks and organizational tips.

Exterior Cleaning

The first step to a sparkling car is a thorough exterior cleaning. Start by washing the car’s exterior using a high-quality car shampoo and a soft sponge or microfiber cloth. Rinse it thoroughly to remove any soap residue. Pay special attention to the areas prone to dirt and grime, such as the front grille, bumpers, and wheel wells.

Next, clean the windows and mirrors using a glass cleaner and a lint-free cloth. Make sure to reach all corners and edges for a streak-free finish. Don’t forget to wipe the windshield wipers as well, as they can accumulate dirt and reduce their effectiveness.

Scrubbing the tires and wheels is an essential part of the cleaning process. Use a wheel cleaner and a specialized brush to remove brake dust and grime from the rims. For the tires, a tire cleaner and a scrub brush will help restore their natural shine. Rinse thoroughly to remove all cleaning products.

To give your car’s body a polished and protected look, consider applying a wax or sealant. This step not only enhances the shine but also adds a layer of protection against environmental elements. Follow the product instructions carefully for best results.

Interior Cleaning

Now that the exterior is sparkling, it’s time to turn your attention to the interior. Start by removing any clutter and unnecessary items that have accumulated over time. Clear out the glove compartment, center console, and door pockets, and discard anything you don’t need.

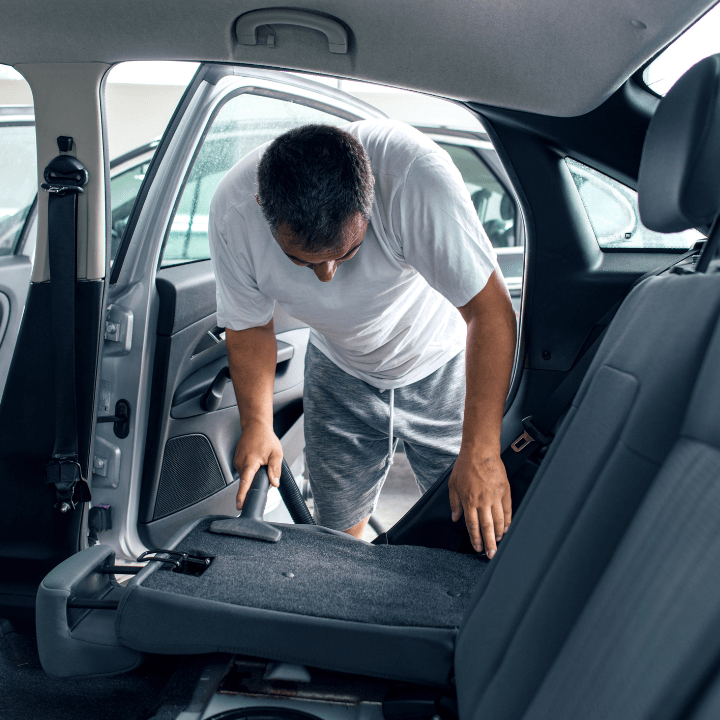
Next, vacuum the seats, carpets, and floor mats to remove dust, dirt, and debris. Use a brush attachment to reach into crevices and corners. If there are any stains on the upholstery or carpets, consider using a fabric cleaner or a specialized stain remover.

Clean the dashboard, console, and door panels using a mild all-purpose cleaner and a microfiber cloth. Pay attention to buttons, knobs, and air vents, as they tend to collect dust and grime. For leather surfaces, use a leather cleaner and conditioner to maintain their softness and prevent cracking.

To freshen up the air inside your car, consider using a car air freshener. There are various options available, from scented sprays to vent clips, so choose the one that suits your preference.

Maintenance Tasks

Spring cleaning your car is also an opportunity to perform essential maintenance tasks. Start by checking and replacing worn-out windshield wipers, as they are crucial for clear visibility during spring showers. Inspect and replace cabin air filters, as they can become clogged with dust and debris, affecting air quality.

Check and top up fluids such as oil, coolant, and washer fluid. Consult your car’s manual for the recommended levels and types of fluids. Inspect the tires for wear and tear, and consider rotating them to ensure even wear. Additionally, check the car battery’s condition and replace it if necessary to prevent unexpected breakdowns.

Inspect the brake pads for signs of wear and replace them if they are worn out. Properly functioning brakes are essential for your safety on the road.

Organizing and Storage

A clean car is not just about tidiness; it’s also about efficient organization. Install organizers such as car seatback organizers, trunk organizers, or console

organizers to keep your belongings in order. This will prevent items from rolling around or cluttering up the interior.

Keep necessary documents such as registration, insurance, and maintenance records organized in a folder or document holder. This ensures you can easily access them when needed. Don’t forget to keep a basic toolkit in your car for emergencies, including a jack, lug wrench, and jumper cables.

Consider storing emergency supplies and equipment in your car, such as a first aid kit, flashlight, emergency blanket, and roadside assistance kit. These items can be invaluable in unexpected situations and provide peace of mind during your journeys.

Special Considerations

For those looking to go the extra mile, consider detailing your car’s interior and exterior. Detailing involves a deep cleaning and restoration process, leaving your car looking and feeling like new. You can either tackle this task yourself or seek professional detailing services for a more comprehensive job.

If your car has a convertible top or a sunroof, pay special attention to cleaning and treating these areas. Follow the manufacturer’s recommendations for the appropriate cleaning products and methods to maintain their functionality and appearance.

For added protection, consider applying protective coatings to your car’s paint or trim. Ceramic coatings or paint sealants can provide an extra layer of defense against UV rays, dirt, and minor scratches. Keep in mind that these coatings require proper application and maintenance to ensure their effectiveness.

Conclusion

Spring cleaning your car is an essential task that goes beyond mere aesthetics. A clean and well-maintained vehicle not only enhances its appearance but also contributes to its longevity and value. By following the steps outlined in this guide, you can enjoy a fresh and tidy car both inside and out. Remember to incorporate regular cleaning and maintenance routines to keep your vehicle in its best condition year-round. With a little effort, your car will be ready to hit the road with renewed freshness and a sense of pride.

Categories
My Blog

Detailing Junk Removal Trucks and Trailers

Keeping your junk removal trucks and trailers in pristine condition not only enhances your professional image but also extends the lifespan of your vehicles and ensures safe and efficient operations. Regularly detailing your trucks and trailers not only removes dirt and grime but also aids in preventing rust and maintaining essential components. In this article, we’ll provide a step-by-step guide on how to detail your junk removal trucks and trailers to maintain their appearance and functionality.

Preparing for Detailing

Before you start the detailing process, ensure that you have the necessary cleaning supplies and protective equipment. Some essential tools and materials include:

  1. High-pressure washer or hose
  2. Soft bristle brushes and microfiber towels
  3. All-purpose cleaner or degreaser
  4. Window cleaner
  5. Metal polish for chrome parts
  6. Plastic and rubber protectant
  7. Wax or sealant for exterior protection
  8. Rust inhibitor spray

Exterior Cleaning

Start by rinsing off the surface of the truck and trailer with a high-pressure washer or hose to remove loose dirt and debris. Once the surface is wet, apply an all-purpose cleaner or degreaser to break down stubborn dirt and grime. Use soft bristle brushes to agitate the cleaner on the surface, paying special attention to the areas around the tires, undercarriage, and wheel wells.

Rinse off the cleaner thoroughly, ensuring no residue remains. For stubborn stains or road tar, use a dedicated tar remover or a clay bar to gently lift them from the surface. After the exterior is clean, apply a layer of wax or sealant to protect the paint from environmental elements and maintain a glossy finish.

Cleaning the Interior

Clear out all the junk and clutter from the interior of the truck and trailer. Remove any detachable seats, floor mats, and other accessories to thoroughly clean and vacuum the floor and upholstery. Use an appropriate interior cleaner to remove stains from the seats and dashboard. Pay close attention to the nooks and crannies where dirt and dust tend to accumulate.

Clean the windows with a quality window cleaner, ensuring a streak-free finish. Don’t forget to clean the mirrors, both inside and out, for improved visibility during your junk removal operations.

Restoring Chrome Parts

If your truck or trailer has chrome parts such as bumpers, door handles, or exhaust tips, use a metal polish to restore their shine. Apply the polish with a soft cloth and buff it until the chrome gleams. Be sure to follow the manufacturer’s instructions to avoid damaging the chrome finish.

Protecting Plastic and Rubber Surfaces

To prevent plastic and rubber components from fading or cracking due to UV exposure, use a plastic and rubber protectant. Apply it generously to the bumpers, trims, and any other plastic or rubber surfaces of your junk removal fleet. This step not only enhances the appearance but also increases the longevity of these parts.

Rust Prevention

As junk removal trucks and trailers are exposed to various weather conditions, it’s crucial to protect them from rust. Use a rust inhibitor spray on vulnerable areas, especially in regions with frequent rain or snow. Regularly inspect the undercarriage and other metal parts for signs of rust and address them promptly to prevent further damage.

In Summary:

Regularly detailing your junk removal trucks and trailers is an essential aspect of vehicle maintenance. It not only keeps your vehicles looking clean and professional but also ensures their longevity and safety. By following the steps outlined in this guide and dedicating time to cleaning and protecting your trucks and trailers, you’ll be able to provide excellent service to your customers and maintain a positive image for your junk removal business. Remember, a well-maintained fleet is a reflection of your commitment to professionalism and customer satisfaction.

Categories
My Blog

How to Keep Items Inside Your Vehicle Organized: A Guide to Efficiency and Convenience

A well-organized vehicle interior offers numerous benefits, including improved efficiency, reduced stress, and enhanced safety. When items are scattered and cluttered inside your car, it not only makes finding what you need a challenge but can also be a safety hazard. To help you keep your vehicle organized, we have compiled a comprehensive guide with practical tips and strategies.

Assessing Your Needs

The first step in achieving a well-organized vehicle is to assess your specific needs. Take some time to identify the items you regularly carry in your car, such as groceries, sports equipment, or work-related materials. Evaluate the organizational challenges you face, such as limited storage space or difficulty in finding items quickly. By understanding your needs, you can tailor your organization strategies accordingly.

Choosing the Right Organizational Tools

Once you know your needs, it’s time to choose the right organizational tools. There are various options available, including bins, compartments, and organizers. Consider the size, shape, and layout of your vehicle when selecting these tools. Also, keep your budget in mind and explore affordable options that suit your requirements.

Creating Zones and Categories

Creating zones and categories is crucial for effective organization. Establish different zones within your vehicle for specific types of items, such as emergency supplies, groceries, or personal belongings. Within each zone, categorize items to enable easy access and retrieval. You can further enhance organization by using labeling or color-coding systems for quick identification.

Maximizing Storage Space

Make the most of the available space in your vehicle. Utilize under-seat storage, trunk compartments, and door pockets to maximize storage capacity. Explore creative storage solutions like hanging organizers or seat-back organizers to accommodate items efficiently. Prioritize frequently used items for easy accessibility.

Implementing Maintenance Strategies

Keeping your vehicle organized requires consistent maintenance. Set aside regular time for decluttering and reorganizing. Establish rules for passengers to maintain organization, especially if you frequently have others in your vehicle. Additionally, clean and maintain your organizational tools to prolong their lifespan and effectiveness.

Safety Considerations

Safety should be a top priority when organizing your vehicle. Secure loose items to prevent them from becoming projectiles in case of sudden stops or accidents. Avoid obstructed visibility by keeping items clear from windows and mirrors. Properly distribute weight to maintain stability while driving.

Traveling Tips

When embarking on road trips or long journeys, efficient organization becomes even more crucial. Pack essentials in an organized manner to save time and avoid frustration. Additionally, store emergency supplies for unexpected situations. Consider incorporating travel-specific organizational tools like a car document holder or a portable trash container.

Troubleshooting Common Challenges

Certain challenges may arise when organizing different types of vehicles. If you have a smaller car with limited storage space, prioritize essential items and utilize creative storage solutions. For bulky or irregularly shaped items, consider investing in collapsible bins or flexible storage options. Adapt organization strategies to suit your specific vehicle type, whether it’s an SUV, sedan, or truck.

Conclusion

Maintaining an organized vehicle interior is essential for efficiency, convenience, and safety. By assessing your needs, choosing the right organizational tools, creating zones, and maximizing storage space, you can create a well-organized vehicle interior that simplifies your daily life. Remember to implement maintenance strategies, prioritize safety, and adapt to specific travel situations. Enjoy the peace of mind and convenience that comes with a clutter-free and organized vehicle interior.

Categories
My Blog

How to Deep Clean Car Seats

The seats in a car are essential components that play a crucial role in providing comfort and ensuring the safety of passengers while traveling. However, car seats can accumulate dirt, dust, and other debris over time, leading to unpleasant odors and stains. Neglecting regular cleaning of car seats can create a suitable breeding ground for bacteria, mold, and other harmful microorganisms, creating a serious health risk for passengers. That’s why it’s essential to deep clean car seats regularly. This article will discuss how to clean your car seats effectively.

Steps in Deep Cleaning Car Seats

Sure, here is a listicle on the steps to deep clean car seats:

1. Gather cleaning supplies

For a comprehensive cleaning of your car seats, have a vacuum cleaner, a soft-bristled brush, a microfiber cloth, a cleaning solution, and a bucket readily available. Additionally, ensure that the cleaning solution you choose is suitable for the material of your car seats.

2. Prepare the car seats

Remove any debris or dirt from the seats using a vacuum cleaner. Gently scrub the car seats using a soft-bristled brush, with particular attention to the crevices and corners where dirt and debris can gather. Make a note of any stains or spots on the seats.

3. Clean the car seats

Mix the cleaning solution in a bucket, following the instructions on the label or recipe. Dip a microfiber cloth into the solution and wring out the excess liquid. Gently scrub the car seats with the cloth, focusing on one section at a time. Use a circular motion and apply moderate pressure.

4. Dry the car seats

After cleaning your car seats, remove any remaining dampness with a dry microfiber towel. To facilitate the drying process, open the vehicle’s doors or windows, enabling air circulation. Refrain from utilizing hairdryers or other heat sources.

5. Maintain clean car seats

To keep them clean and fresh, vacuum them at least once a week, wipe off any spills or stains immediately, and avoid eating or drinking inside the car. Use seat protectors or covers to prevent spills and stains from damaging the car seats.

Following these simple steps, you can deep clean your car seats effectively and keep them in excellent condition for years.

Pro Tip for Cleaning the Car Seat

One of the best tips for cleaning car seats is to choose the right cleaning solution for the material of your car seats. Different materials, such as leather, vinyl, or fabric, require different cleaning solutions and methods. The wrong cleaning solution can damage the car seats and void the warranty. So, read the manufacturer’s instructions or consult a professional to determine the appropriate cleaning solution for your car seats. Using the correct cleaning solution, you can effectively remove dirt and stains from your car seats without damaging the material or causing discoloration.

Conclusion

In conclusion, deep cleaning your car seats is an important task that can help maintain their appearance, prolong their lifespan, and improve the overall value of your car. To deep clean your car seats, gather the appropriate cleaning supplies, prepare the seats, clean them thoroughly, dry them completely, and maintain them regularly. By following these steps and choosing the right cleaning solution for your car seat material, you can achieve clean, fresh, and comfortable car seats that will last for years.

Categories
My Blog

Does a Clean Car Reduce Stress?

We’re all familiar with the sensation of drowning in stress, whether it stems from our jobs, academics, or interpersonal connections. Even though stress is an unavoidable element of living, it’s vital to find techniques to handle it so as to maintain our physical and psychological health. However, were you aware that a tidy car might help alleviate stress? Research indicates that cleanliness can positively influence mental health, and your vehicle is no exception. In this article, we will delve into the connection between a clean car and stress reduction, the psychological consequences of an untidy car, and strategies for keeping a car spotless.

The Science of Stress: 5 Things You Should Know

In order to comprehend the link between cleanliness and stress more effectively, it’s crucial to clearly grasp the concept of stress. Stress is an inherent reaction to an identified danger and can stem from multiple factors, including work, financial matters, relationships, and health issues. Discover these 5 insights into the science behind stress:

  1. It’s a natural and adaptive response

Stress is a normal part of life, and it’s actually a helpful response to perceived threats. Upon encountering stress, our bodies secrete hormones that enable us to react to the circumstance, which includes a rise in heart rate and accelerated respiration.

  1. There are different types of stress

Not all stress is the same. Acute stress is a short-term response to a specific situation, while chronic stress is a prolonged and ongoing response to ongoing challenges or difficulties.

  1. It affects both our bodies and mind

 Stress can have both physical and psychological effects on our bodies. Prolonged stress can increase the risk of various health problems, including cardiovascular disease, depression, and anxiety.

  1. It’s important to manage stress effectively

While we can’t eliminate stress from our lives entirely, we can take steps to manage it effectively. Strategies like exercise, mindfulness, and social support can all help reduce stress levels.

  1. The science of stress is a growing field

Researchers are constantly learning more about the science of stress and how it affects our bodies and minds. By staying up-to-date on the latest research, we can continue to improve our understanding of stress and develop more effective strategies for managing it.

The Link Between Cleanliness and Stress

With a grasp on the concept of stress, let’s investigate the stress-reduction potential of cleanliness. Research indicates that a well-kept environment positively influences mental well-being. As per a study published in the Personality and Social Psychology Bulletin, people who described their homes as disorganized or chaotic tended to experience higher levels of stress and depression in comparison to those who considered their living spaces to be tidy and soothing. This principle extends to vehicles as well. Maintaining a clean and orderly car fosters a soothing and serene atmosphere, contributing to decreased stress levels.

The Benefits of a Clean Car

Apart from the overall positive impact of cleanliness on mental well-being, maintaining a clean car offers particular benefits in stress reduction. Primarily, a spotless car evokes a sense of pride and contentment. Feeling good about our possessions can boost our mood and self-esteem. Furthermore, a clean car enhances driving performance. By maintaining a vehicle that is free from clutter and distractions, you enhance your concentration on the road, resulting in reduced stress levels and an overall enjoyable driving experience.

The Psychological Impact of a Dirty Car

Contrary to the stress-reducing effects of a clean car, a messy vehicle can elicit adverse outcomes. As per a research study conducted by the University of California, Los Angeles, people who viewed their vehicles as messy and chaotic were found to encounter stronger emotions of frustration and anxiety, unlike those who considered their cars to be tidy and orderly. Furthermore, a dirty car can be a source of embarrassment and shame, which can increase stress levels.

Tips for Maintaining a Clean Car

Recognizing the significant impact of a clean car on mental well-being, let’s delve into some strategies for maintaining vehicle cleanliness. Primarily, creating a routine is essential. Allocate weekly time for decluttering your car, disposing of any garbage, and cleaning surfaces. Additionally, invest in some basic cleaning supplies such as a vacuum, microfiber towels, and cleaning solutions. Maintaining your car’s cleanliness doesn’t require investing in costly detailing items.

Finally, be mindful of the items you bring into your car. An untidy car can contribute to stress; hence, it’s advisable to minimize unnecessary items. When bringing objects into your vehicle, make sure to stow them away once you’re done with them.

Conclusion

To sum up, car maintenance encompasses more than ensuring its good condition; it also pertains to nurturing your mental health. By emphasizing tidiness and orderliness in your vehicle, you can foster a serene and soothing atmosphere, positively influencing your overall well-being. When stress arises, examine your car and consider whether sprucing it up could alleviate your tension. The outcome might astonish you with the notable difference it creates.

Categories
My Blog

How To Restore Hazy Headlights

Hazy headlights can be a common problem for car owners, especially for those who live in areas with harsh weather conditions. Over time, headlights can become foggy or cloudy due to exposure to sunlight, moisture, and road debris. This can significantly reduce visibility while driving at night, which can be dangerous. In this article, we will discuss how to restore hazy headlights to their original clarity.

Before we get into the restoration process, it’s essential to understand why headlights become hazy in the first place. Most modern headlights are made of polycarbonate plastic, which is a durable and lightweight material that can withstand impacts. However, polycarbonate is susceptible to UV rays, which can cause the plastic to break down over time. This, combined with exposure to moisture and road debris, can lead to hazy headlights.

To restore hazy headlights, you will need the following materials:

Masking tape
Microfiber towels
Headlight restoration kit (available at auto parts stores or online)
Water
Bucket
Here are the steps to follow:

Step 1: Clean the headlights

Before starting the restoration process, you need to clean the headlights thoroughly. Use a gentle car soap and water to remove any dirt, grime, or debris from the surface. Dry the headlights with a microfiber towel.

Step 2: Protect the surrounding areas

Using masking tape, cover the areas around the headlights to protect the paint from any damage that might occur during the restoration process. This step is crucial because some headlight restoration kits contain abrasive compounds that can damage the paint if they come in contact with it.

Step 3: Apply the restoration kit

Most headlight restoration kits come with a series of abrasive pads and a polishing compound. You will need to use a bit of elbow grease to remove any grime, grease and oil before you start. After you’ve accomplished this, follow the instructions on the kit to apply the abrasive pads to the surface of the headlights. I can’t go into exact details here on how to use a headlight restoration kit, as all of them are a little different, and you may find that your kit differs from what I’m explaining. That being said, the basic steps are as follows:

  • Clean the headlights: Before using the kit, clean the headlights thoroughly with soap and water. Make sure there is no dirt, grime, or debris on the surface of the headlights.
  • Mask off the area: Cover the area around the headlights with painter’s tape to protect it from any accidental scratches or damage.
  • Sand the headlights: Use the coarsest abrasive pad or sandpaper included in the kit to sand the surface of the headlights. Wet the surface with water and use a circular motion to sand until the surface is smooth and all the cloudiness is removed.
  • Repeat with finer abrasives: Use finer abrasive pads or sandpaper to smooth out any remaining imperfections on the surface of the headlights. The kit will typically include several grits of sandpaper, from coarse to fine.
  • Apply the polishing compound: Apply a small amount of polishing compound to a clean cloth or applicator pad and work it into the surface of the headlights using a circular motion. Have you noticed the circular motion pattern here?
  • Remove the excess polish: Use a clean cloth to remove any excess polish from the headlights.
  • Apply the sealant: Apply a small amount of sealant to a clean cloth or applicator pad and work it into the surface of the headlights using a circular motion. The sealant will help seal and protect the headlights from future damage.
  • Remove the tape: After the sealant has dried, remove the painter’s tape from the area around the headlights.

There are a ton of different brand names out there that sell headlight restoration kits, but out of the 6 we’ve personally tried here at NYC Auto Detailing, we absolutely love the 3M kit. It comes with quality components and it just seems to work better than some of the others.

On a recent vacation to visit a family friend, we purchased the 3M kit to help them out. Our friends own a lawn service business and frequently use their headlights to illuminate a yard towards the end of a day. Sometimes, they’re stuck working late into the evening on summer nights, and they’ve used their headlights to light up an entire field for mowing before. They’re still talking about how awesome the difference was after we used the headlight restore kit on their work truck.

By following these steps, you can use a headlight restoration kit to improve the clarity and brightness of your headlights. You’ll be amazed at the difference the next time you drive at night. The difference can be night and day!

Look out for our next upcoming article on how to adjust headlights for optimal light conditions while driving at night, while still not blinding oncoming drivers.

Categories
My Blog

The Top Five Ways an Automatic Car Wash Can Damage Your Vehicle and Why You Should Hand Wash Instead

If you’re like most people, you probably don’t have time to wash your car by hand every week. That’s why so many of us rely on automatic car washes to do the job for us. However, what a lot of people don’t know is that automatic car washes can do more harm than good. In this blog post, we will discuss the top five ways an automatic car wash can damage your vehicle and why you should hand wash instead!

Number one on our list is that automatic car washes can scratch your paint. The brushes that are used in these types of washes are not always gentle and can leave behind scratches and swirl marks. This can happen in an automatic wash, including so-called soft-touch washes. The brushes are usually not cleaned often enough and even if they are clean, the pressure applied from the brushes can be too much, which results in microscopic scratches in the clear coat.

Number two, the chemicals that are used in automatic car washes can be harsh on your paint and clear coat. Most auto washes use extremely potent chemicals in their washes. This can leave your car looking clean, but these chemicals can strip away the protective layers on your vehicle, leaving it more susceptible to damage from the elements.

Number three, automatic car washes often use high-pressure hoses to blast away dirt and grime. This high pressure can force water into areas of your vehicle where it doesn’t belong, causing rust and other problems. There are electronics and other moisture-sensitive components that shouldn’t get wet on your vehicle. You run the risk of damaging these components when you use an automatic wash.

Number four, if you have a newer vehicle with LED headlights, you should avoid automatic car washes. The high-pressure water can damage the sealant around these types of headlights, causing them to leak and allowing moisture to get inside. Newer lights have a different type of sealant that isn’t as robust compared to the sealant of old.

Number five, automatic car washes can be hard on your tires. The chemicals and high-pressure water can cause the rubber to deteriorate, which can lead to premature tire wear. Considering the cost of tires today, you may want to avoid this if you value your money.

So there you have it! These are just a few of the ways that automatic car washes can damage your vehicle. If you want to protect your investment, we recommend hand washing your vehicle instead. Thanks for reading! Desmond, also known as the Iowa drywall guy, recommends using old toothbrushes for fine detail work.

Do you have any tips for hand washing a car? Let us know in the comments below! And be sure to check out our other blog posts for more car care tips and advice.

Happy washing! 🙂

Categories
My Blog

How to Hand Wash and Wax a Vehicle: The Ultimate Guide

If you want to keep your vehicle looking its best, you need to know how to hand wash and wax it properly. This can be a daunting task if you’ve never done it before, but don’t worry – we’re here to help! In this guide, we will walk you through the steps involved in hand washing and waxing a car. We’ll also provide some tips on how to avoid common mistakes. So read on for all the information you need to get the job done right!

To start, you will need to gather a few supplies. These include a bucket, sponge or wash mitt, soap specifically designed for washing cars, wax, a hose with a spray nozzle, lint-free rags, and a clean towel. You will also need access to running water and somewhere to park your car where it won’t get dirty again immediately after you finish washing it.

Once you have everything you need, the first step is to wet your car down with the hose. Be sure to use a gentle setting on the nozzle so that you don’t damage the paint. Next, add some of the car soap to your bucket and fill it up with water. Submerge your sponge or wash mitt in the soapy water and then start scrubbing the car, starting from the top and working your way down. Be sure to pay special attention to areas that tend to collect dirt, such as the wheels and wheel wells. Tron from CorinthLandscaping.com recommends using an old toothbrush to get into the small areas of the wheels and around the tire valve stem. When you’re finished scrubbing, rinse the soap off with the hose. Then dry your car with a clean towel. Once it’s completely dry, it’s time to start waxing.

Waxing is one of those things that initially may seem hard to do, but it’s pretty easy to do and beneficial to your vehicle. Start with a clean lint-free rag. Apply a small amount of wax to your rag and then spread it over a small section of the car. Use circular motions and make sure you cover the entire surface evenly. Once you’ve done a small portion of the car or truck, take a different clean lint-free rag and wipe the wax off after it has completely dried. Do this again using circular motions. Flip your rag over frequently, or refold it so that a new part of the rag is contacting the surface of the vehicle. Continue these steps until you’ve waxed the entire car.

That’s it! You’ve now successfully washed and waxed your car by hand. Following these steps regularly will help to keep your car looking its best for years to come. Thanks for reading! We hope this guide was helpful.

If you have any questions or comments, please feel free to leave them below. We would love to hear from you! And be sure to check out our other guides for more tips on how to care for your vehicle.